Filling Cracks and Holes in Plaster and PlasterBoard
Preparing The Crack
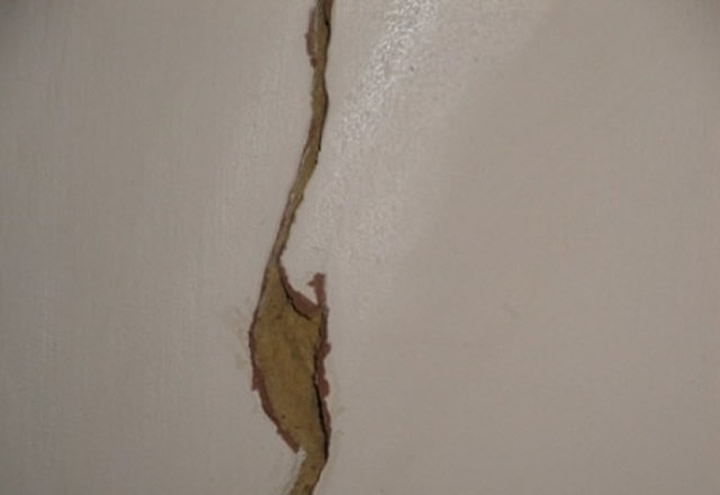
Using the corner of your filling knife to rake out the crack or an old screw driver if the crack is small, ‘V’ the crack, to lose the straight edge of the crack (see picture), this will give the filler a better key and it will blend in easier. Then use an old paintbrush to brush out any dust and loose plaster.
Tools Needed

Mixing Powered Fillers
The best way to mix filler is to put some of the powder in a bowl and trickle in a little water. Mix the paste thoroughly with a small filling knife, adding more powder or water as necessary to achieve a firm but moldable consistency. Filler soon goes sets, so don‘t mix more than you can use in 30 minutes.
Applying The Filler
First dampen the crack with water on a paint brush, and then with small amount of filler on your filling knife blade, fill the crack by drawing the knife across the crack, pressing the filler into place.
Then draw the knife along the line of the crack to remove any excess filler. The filler will harden in about an hour (it will go white when dry). Then use fine glass paper wrapped round a sanding block or Oakey Wet & Dry Sanding Sponge as shown in picture to smooth the filler flush with the plaster.
If filler is thicker than about 6mm it might shrink and need a second application.
Filling Holes
Small holes (up to 6mm deep) can be filled the same as cracks, deeper holes should be filled in two stages, as the filler will shrink, so it will be quicker to dry if you build a base layer, then the second layer.